“Compress this video” can mean three different things: make it fit a hard upload limit, make it smaller without obvious visual damage, or make it easier for a device to decode. Those goals require different settings. The reliable approach is to define the destination first, preserve the source, and change one major variable at a time.
Choose the right compression goal
Use constant quality when you care most about appearance and can accept a variable file size. Use target size when a portal rejects anything above a fixed number of megabytes. Use a fixed bitrate for workflows that require predictable bandwidth. Two-pass encoding is useful for target-size jobs because the first pass measures complexity and the second allocates bits.
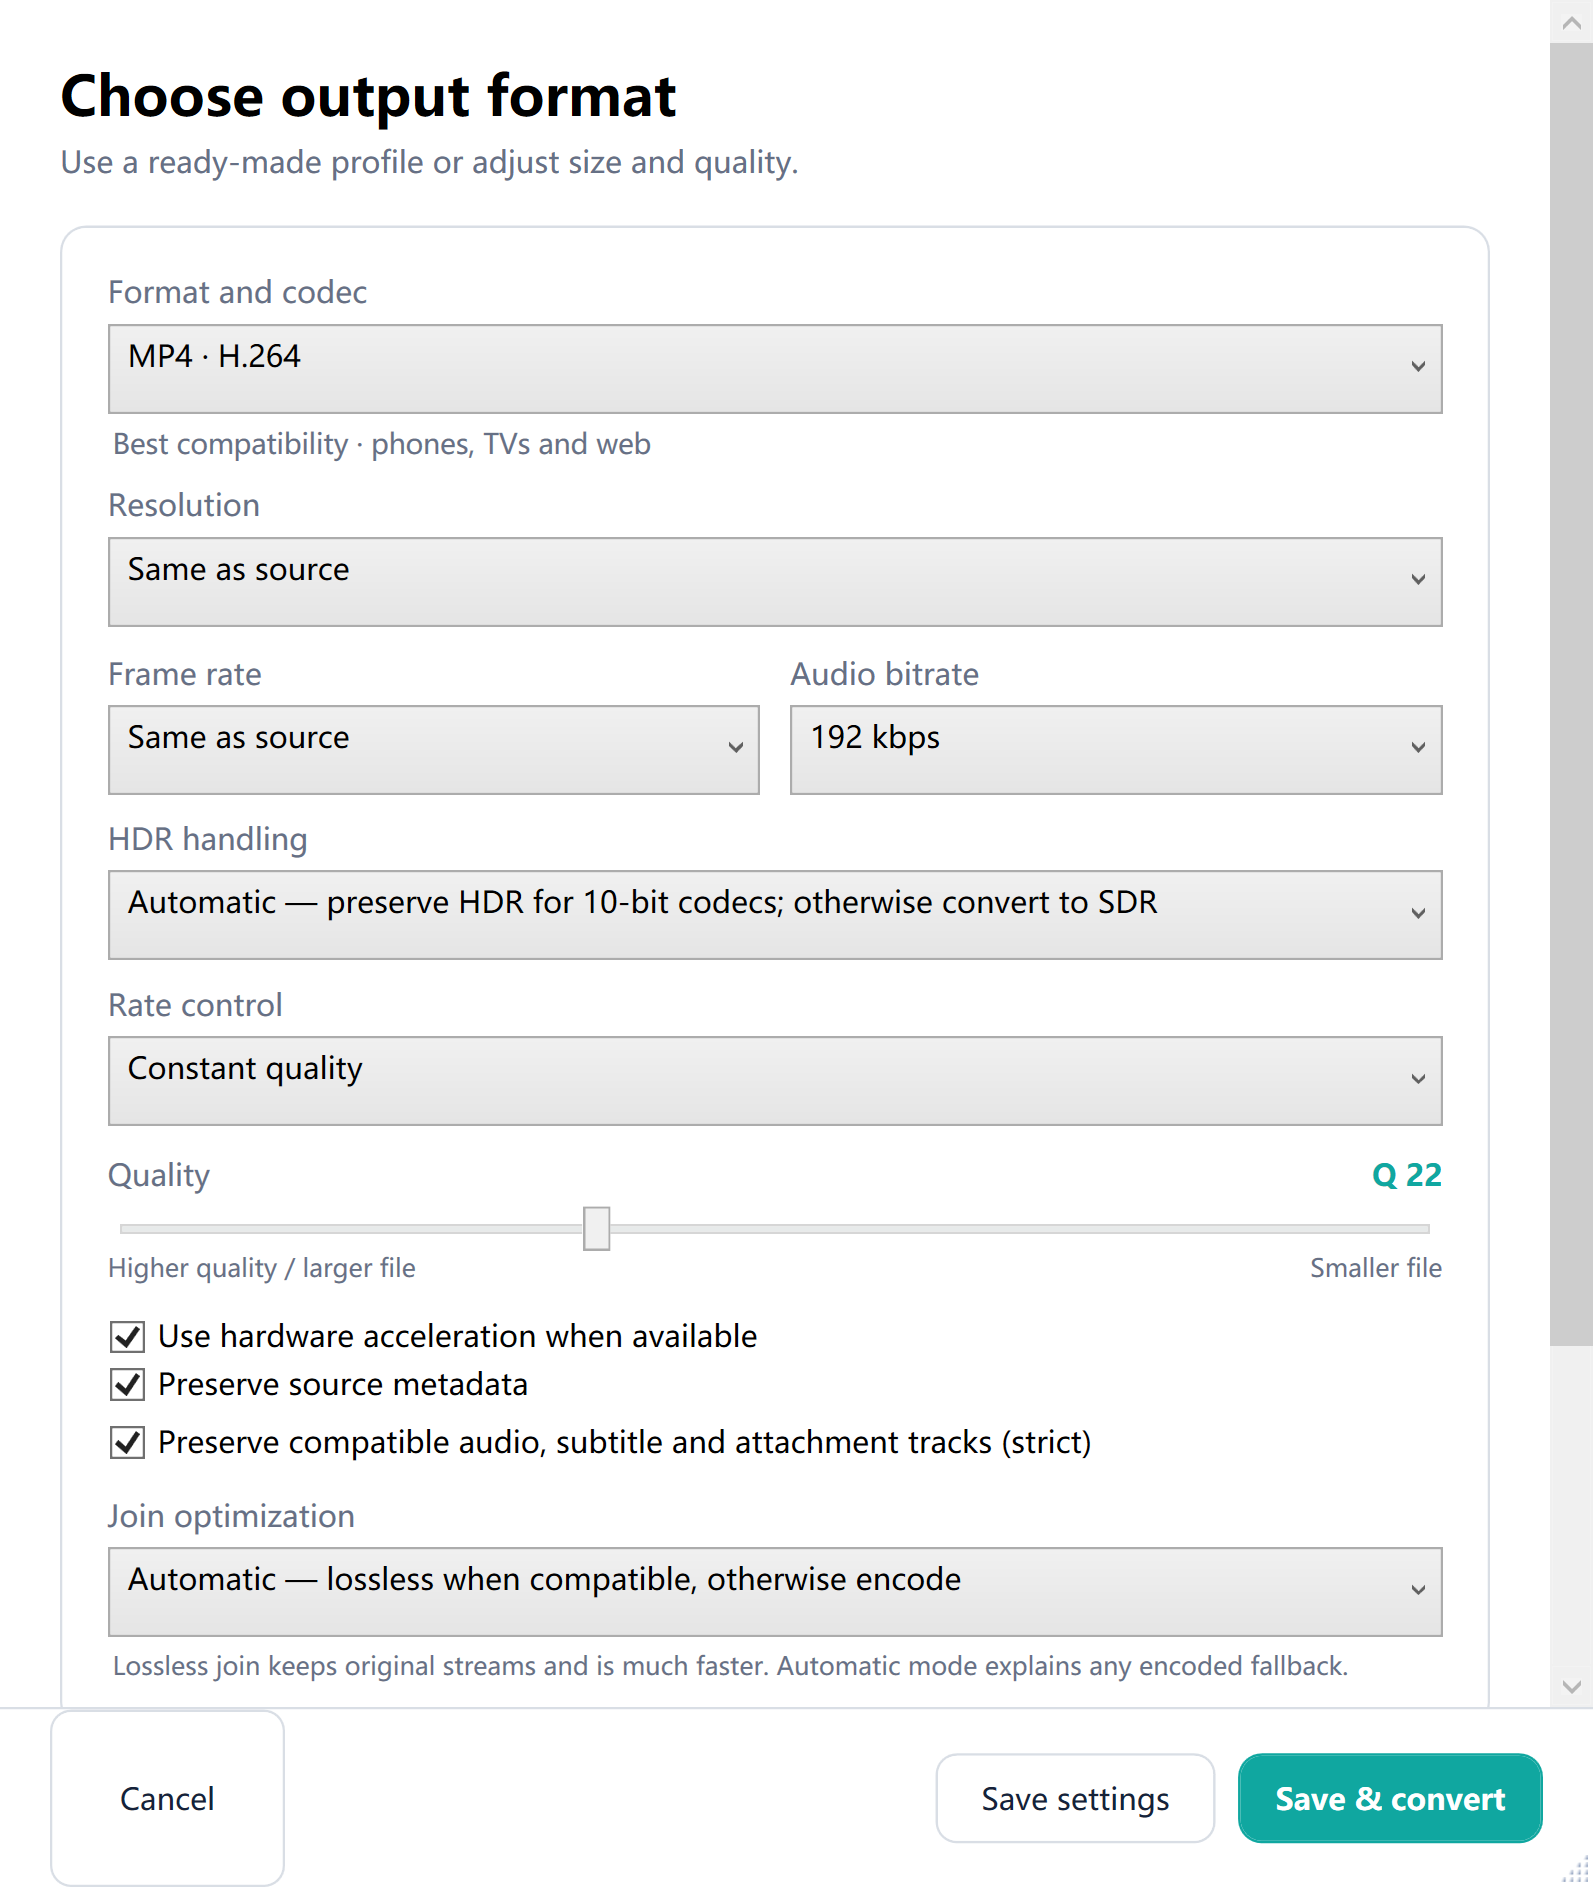
A safe Windows 11 compression workflow
- Add the video and note its duration, resolution, frame rate and codec.
- Choose MP4 H.264 for broad compatibility or H.265/AV1 for better compression when the receiver supports it.
- Keep the original resolution for the first test. Reducing 4K to 1080p is a powerful second step when 4K is unnecessary.
- Choose constant quality and make a short preview sample. Inspect motion, fine texture, gradients and text.
- If a hard limit exists, switch to target size and use two-pass mode.
- Save to a new file, decode the result completely, and compare duration and audio/video synchronization.
What controls video file size?
Duration and total bitrate dominate size. Codec efficiency determines how much quality fits inside that bitrate. Resolution and frame rate change the number of pixels or moments to encode. Audio can also matter: a 192 kbps stereo stream adds roughly 86 MB per hour. Cropping letterbox pixels, removing unneeded tracks and trimming dead time can reduce size before quality is sacrificed.
| Change | Likely size effect | Main trade-off |
|---|---|---|
| H.264 → H.265/AV1 | Smaller at comparable quality | Compatibility and encoding time |
| 4K → 1080p | Large reduction | Less spatial detail |
| 60 fps → 30 fps | Moderate reduction | Less motion smoothness |
| Remove extra tracks | Small to moderate | Fewer languages/features |
Hardware acceleration versus quality
Hardware encoders can be dramatically faster, especially for long queues. Software encoders can sometimes deliver better quality per bit at slower settings. There is no universal winner: test a representative clip on the actual PC and target device. The app exposes hardware acceleration as an option rather than presenting it as a guaranteed speed or quality multiplier.
Five compression mistakes to avoid
- Overwriting the only source copy.
- Reducing resolution and bitrate simultaneously before testing.
- Using an efficient codec that the recipient cannot decode.
- Trusting file size without watching high-motion scenes and reading text.
- Assuming a small preview guarantees the entire file decodes.
Compression FAQ
How small can I make a video without losing quality?
No lossy conversion is literally lossless. The useful threshold depends on content, viewing size and codec. Test a short representative sample instead of relying on one universal number.
Why is the result larger?
The output bitrate, resolution, frame rate, audio streams or codec efficiency may exceed the source. Check the actual stream information rather than comparing preset names.
Should I use H.264 or H.265?
Use H.264 for broad compatibility. Use H.265 when smaller files matter and every target device supports HEVC.
Try the workflow locally
Free Video Converter keeps local source files on your Windows PC and gives you explicit control over output names and settings.
Download Free Video Converter